Wednesday, June 29, 2011

Sock Monkey Labels

I am forever running out the door to a birthday party with a gift and no tag...which is fine when the birthday child opens their gift in front of everyone, but the trend is becoming more and more along the lines of opening gifts after the party, leaving the birthday guests more time to enjoy the festivities.  This means that we end of giving a number of gifts with a very stylish handwritten note on the front of the bag! 

To solve this problem, I whipped up some personalized stickers for my little guy.  I just put his name on them, so they can also be used to label his books and other things.  Win, win!!


If you like these monkey stickers and want some for yourself, come visit my etsy shop!

Another fun place to look for personalized stickers, stationery, bag tags, party invites, and more is over at My Letter Design.

Have fun personalizing!

Monday, June 20, 2011

Menu Plan Monday - June 20, 2011

This week is very kid-friendly because we have a bunch of fun summer time activities keeping us super busy!  Next week will be the time for some fun new recipes, and we'll be getting food ready for the beach!

Breakfasts:
  • Cereal and Milk
  • Yogurt
  • Sausage Quiche
Lunches:
Dinners:
  • Calzones
  • Italian Chicken
  • Beefaroni, Green beans, Muffins
  • Monterey Chicken
  • Lasagna
Snacks:
  • Applesauce
  • Mixed Nuts
  • Crackers
Desserts:
  • Popsicles
  • Sherbert

Tuesday, June 14, 2011

Summer Fun in a Jar

I am a planner, but I also crave spontaneity, so summer time is a challenge for me because I want to have structure in our days, but I also have a million fun things I want us to do. So, one way I will be going about incorporating planned spontaneity is using a "Summer Fun" jar for Finley to pick an activity from each day.  I control what goes in the jar, but I have to make whatever she picks happen each day, no matter what our other plans are. 

Should be interesting!

Here is how I made our Summer Fun jar:


1. Get a pint-sized jar with lid (I got mine from Walmart for about fifty cents a piece...they came in a set of twelve, but I have big plans for the others!).


2. Decorate the outside of the jar.  I attached a strip of scrapbook paper and then a matching "Summer Fun" label using photo squares.


3. To make the lid, I used a piece of scrap fabric I already had.  I first hot glued the lid insert to the fabric.


4. Then I put a strip of hot glue on the inside of the lid and pressed the fabric covered side of the insert down into the lid.


5.  I next added a strip of coordinating ribbon around the edge with hot glue.


6. I also added a little ric rac to the top edge, again using hot glue.


7. Lastly, I cut the fabric using pinking shears.


8. I cut scrapbook paper into strips and hand wrote all the activities.  You could easily print these as well.


9.  I then folded them all up and stuffed them into the jar.


10.  Monday morning I gave Finley her jar and explained the process to her (one a day, not necessarily immediately, etc - she is only four, after all!).  Here she is on Day 1 - Go to the library.  I think it was a success!

Monday, June 13, 2011

Mommy Mondays ~ Waterproof Labels


Mommy Mondays - the little things in life that help make us better* mommies!
*better = more fun, more organized, more sane
 
In between having my two children, I would come across the cutest baby items and yearn for the day I would have a reason to buy them again...now, four years later, I finally have that reason!
One such product I have absolutely coveted is the waterproof label.  Sure, I could have gotten them for my daughter for a myriad of different purposes, but it never felt right because I always thought of them as baby bottle labels.
However, now that I can buy them for my son for baby labels, I can also purchase coordinating ones for all of my daughter's school things without feeling any remorse!  Now that I am thinking about it, I believe I have more items of hers to put these things on...perfect!!

Meal Plan Monday ~ June 13, 2011

This week's goal is NO UNNECCESARY SPENDING! We hosted a big party last weekend so we need to eat up all the actual leftovers and the unused extra ingredients.


Breakfasts:

  • Yogurt
  • Cereal and milk
  • Waffles
  • Sausage casserole

Lunch:

  • Meat and cheesed sandwiches
  • Dinner leftovers
  • Mini quiche (party leftover)
  • Macaroni

Dinners:

  • Ham, potatoes, peas, muffins
  • Calzones
  • Pancakes, bacon
  • Beefaroni, green beans, muffins
  • Mexican casserole

Snacks:

  • Applesauce
  • Smoothies
  • Raisins
  • Trail mix
  • Nuts

Desserts:

  • Sherbet
  • Homemade cookies

Menu Plan Monday at orgjunkie.com

Italian Chicken ~ Freezer Cooking Style

Having marinated chicken in the freezer, ready to pull out at a moment's notice makes dinner so easy during the week.  Here is how I turn one dinner into two!

Instructions for Italian Chicken - Freezer Cooking Style

  • Start with frozen chicken breast strips
  • Put half the chicken in one freezer bag (enough for one meal for your family).
  • Put the other half of the chicken in another freezer bag
  • Add enough Italian dressing to cover the chicken
  • Close the bags and work the dressing all over the chicken

  • Put one bag in the refrigerator (for this week's meal)
  • Put the other bag in the freezer (for another meal down the line)

When you are ready to cook the chicken, pull it out of the refrigerator and place the chicken in a baking dish.  If you are using the frozen chicken, transfer it from the freezer to the refrigerator the day before to thaw.


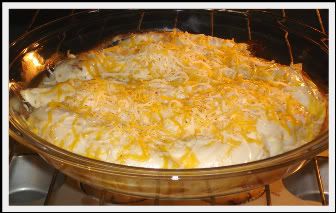
Now, put the chicken in the oven and cook until done (mine took about 30 minutes at 350 degrees).  Just cut into the center of the pieces to see if they are done all the way.  When the look almost done, put some finely shredded cheese on top and cook for another 3-5 minutes .

Remove from the oven once the cheese is melted and serve with potatoes, mixed vegetables, and wild berry muffins.  Enjoy!